University of Redlands
You can now use breakout sessions in meetings to place your participants into smaller groups where they can collaborate and share ideas. Breakout sessions can be used by anyone if they are the meeting host, the cohost, or the attendee.
Breakout sessions are smaller groups that are split off from the main Webex meeting. They allow a subset of meeting participants to collaborate and share ideas over audio and video. Breakout sessions can be used in a number of ways including workshops, classrooms, or when you need a moment to talk privately with a few participants, outside of the main meeting.
Before creating your breakout session, you will need to log into your WebEx account via https://redlands.webex.com. Sign in using your Redlands Single Sign-On account credentials.
Creating Your Breakout Session

Alternatively, you can enable the breakout session feature when you schedule a meeting by selecting the expansion button and then turning the Enable Breakout Sessions to the on position.
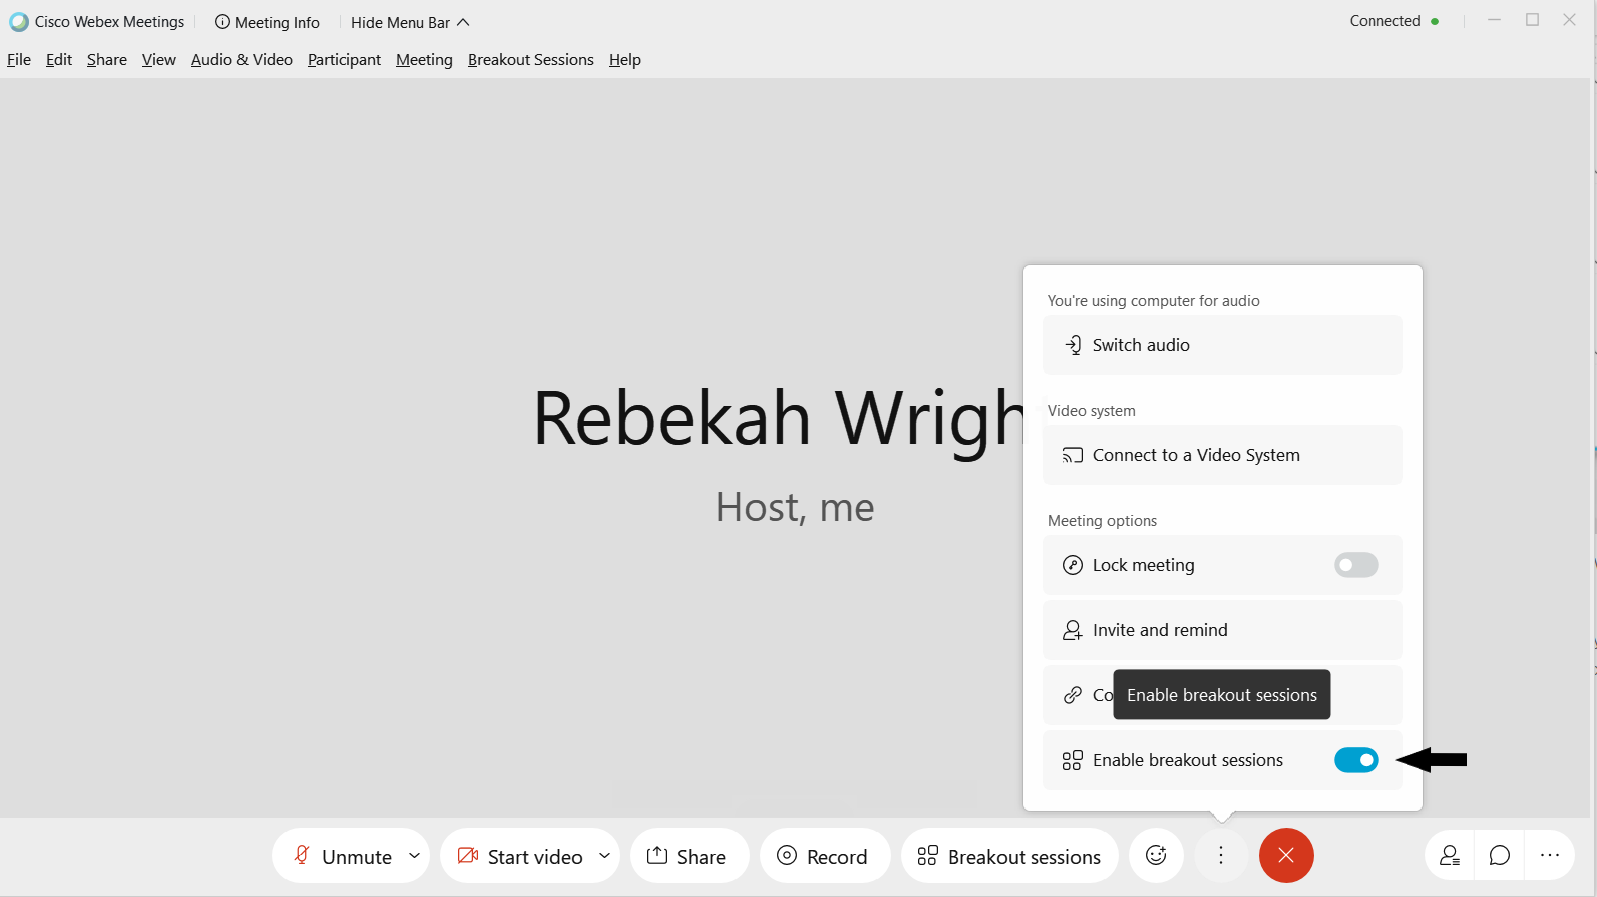
When the breakout session feature is enabled, the Breakout sessions button appears in the meeting controls.
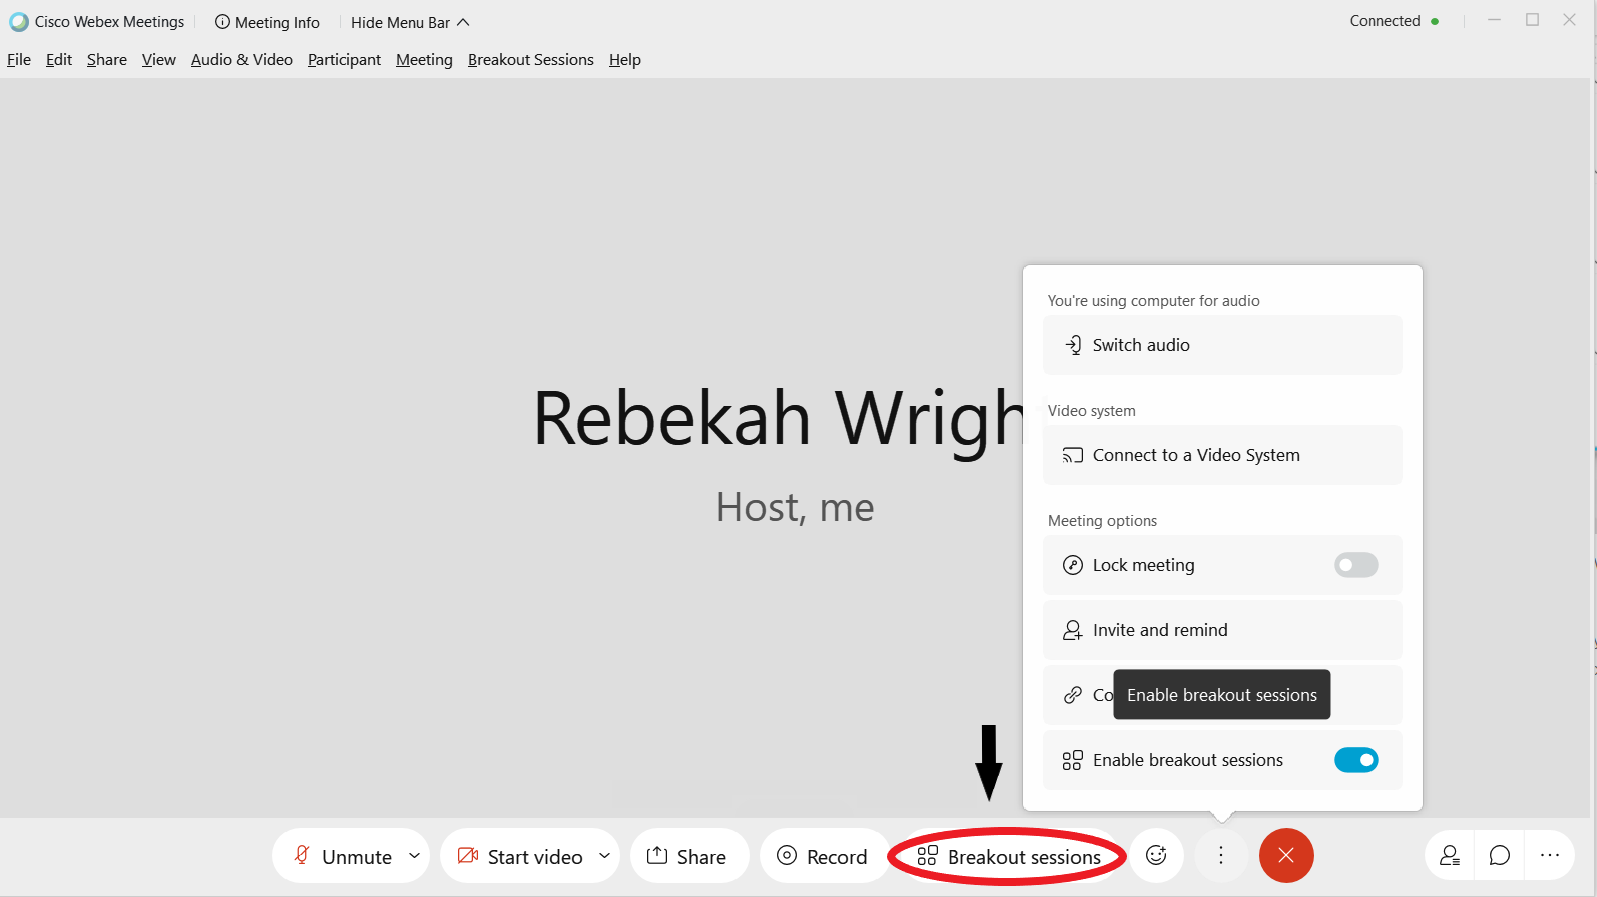
2. In your meeting, select Breakout Sessions.
3. Select the number of breakout sessions you want to create and how you want to assign your participants:
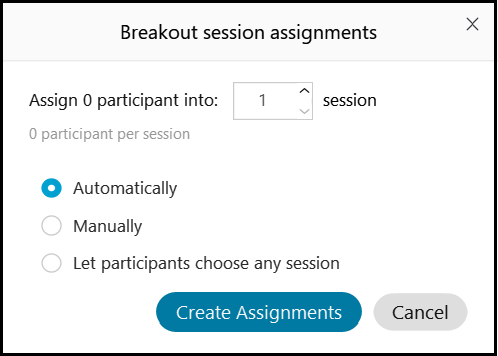
4. Click Create Assignments.
The breakout sessions are created. By default, breakout sessions are named Breakout session 1, Breakout session 2, and so on. You can rename the breakout sessions later.
If you chose Automatically in Step 3, the participants are assigned. If you chose Manually in Step 3, you will need to assign participants to breakout sessions.
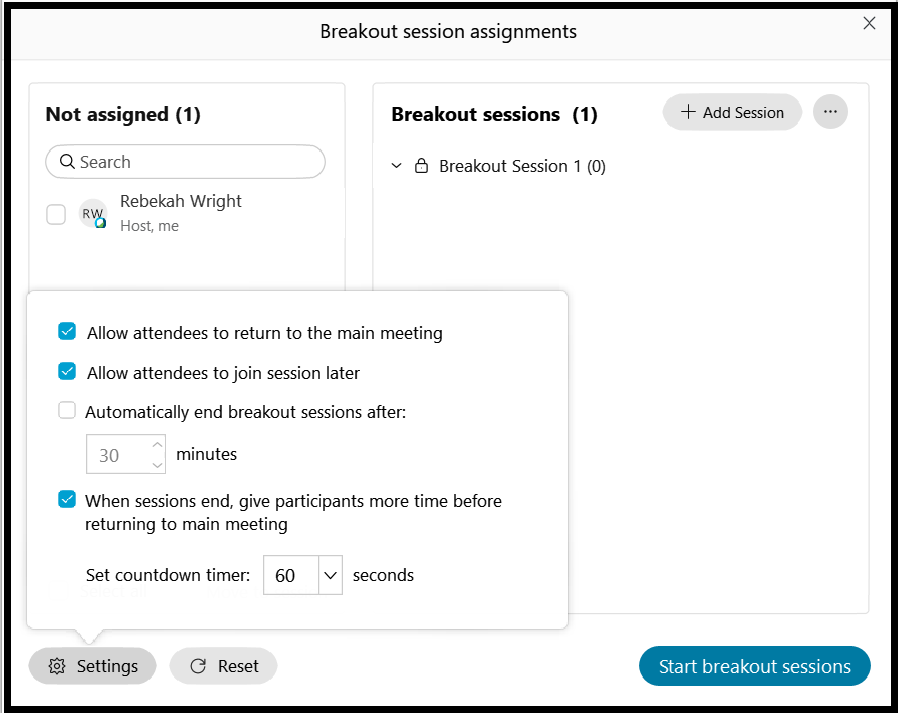
5. You may also change the settings for the breakout sessions by clicking Settings.
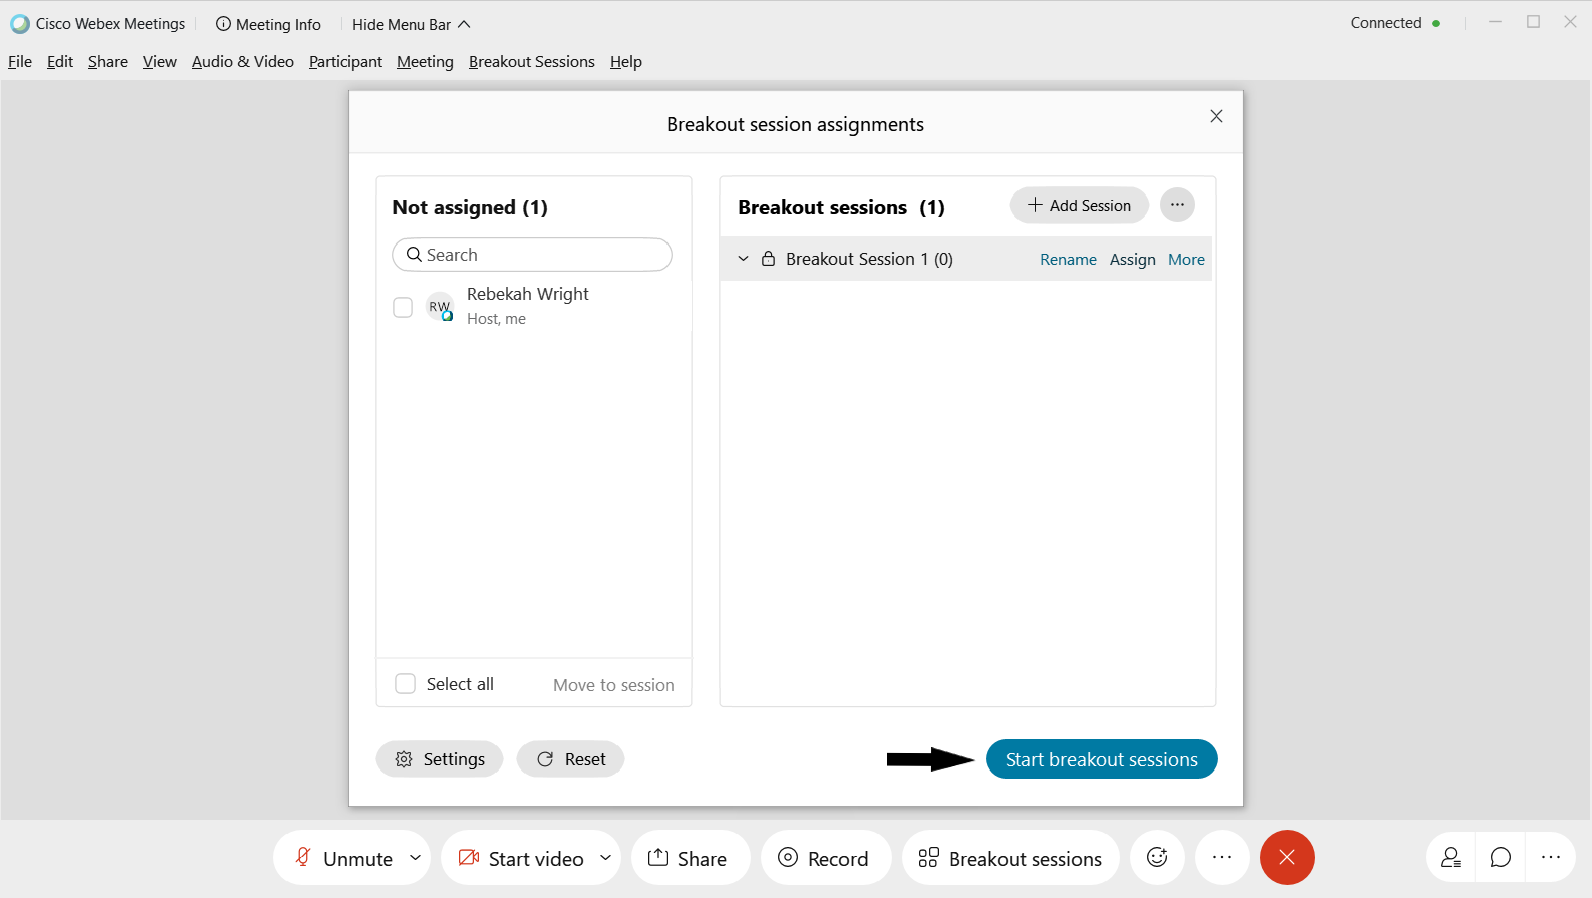
6. When you are ready to start the breakout sessions, click Start Breakout Sessions.
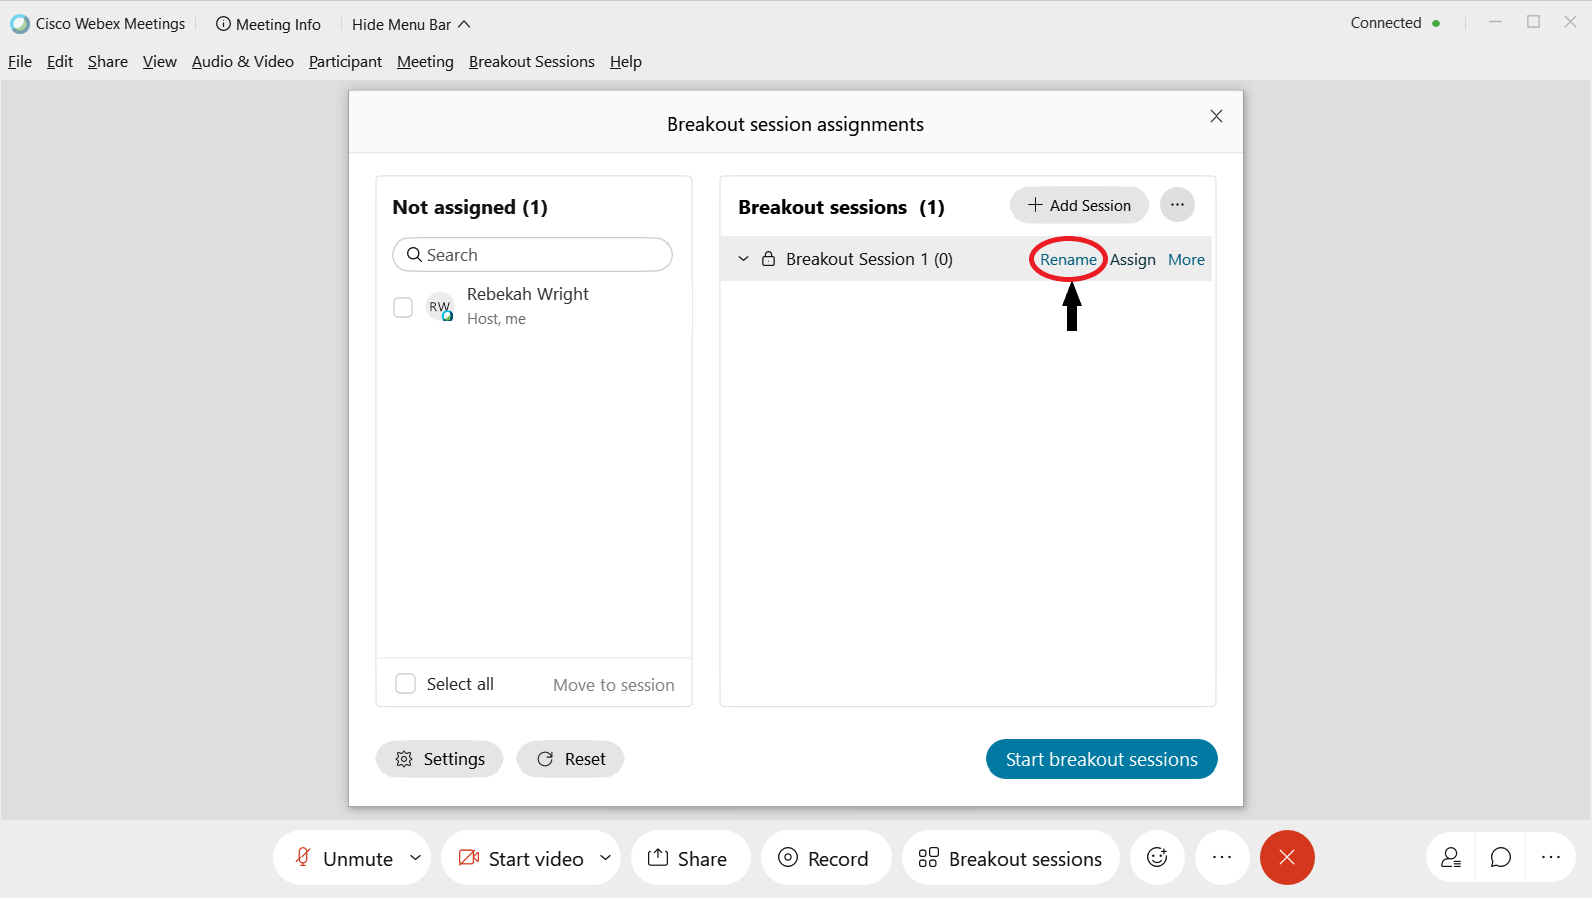
1. If the Breakout session assignments dialog box isn't already open, click Breakout sessions to open it.
![]()
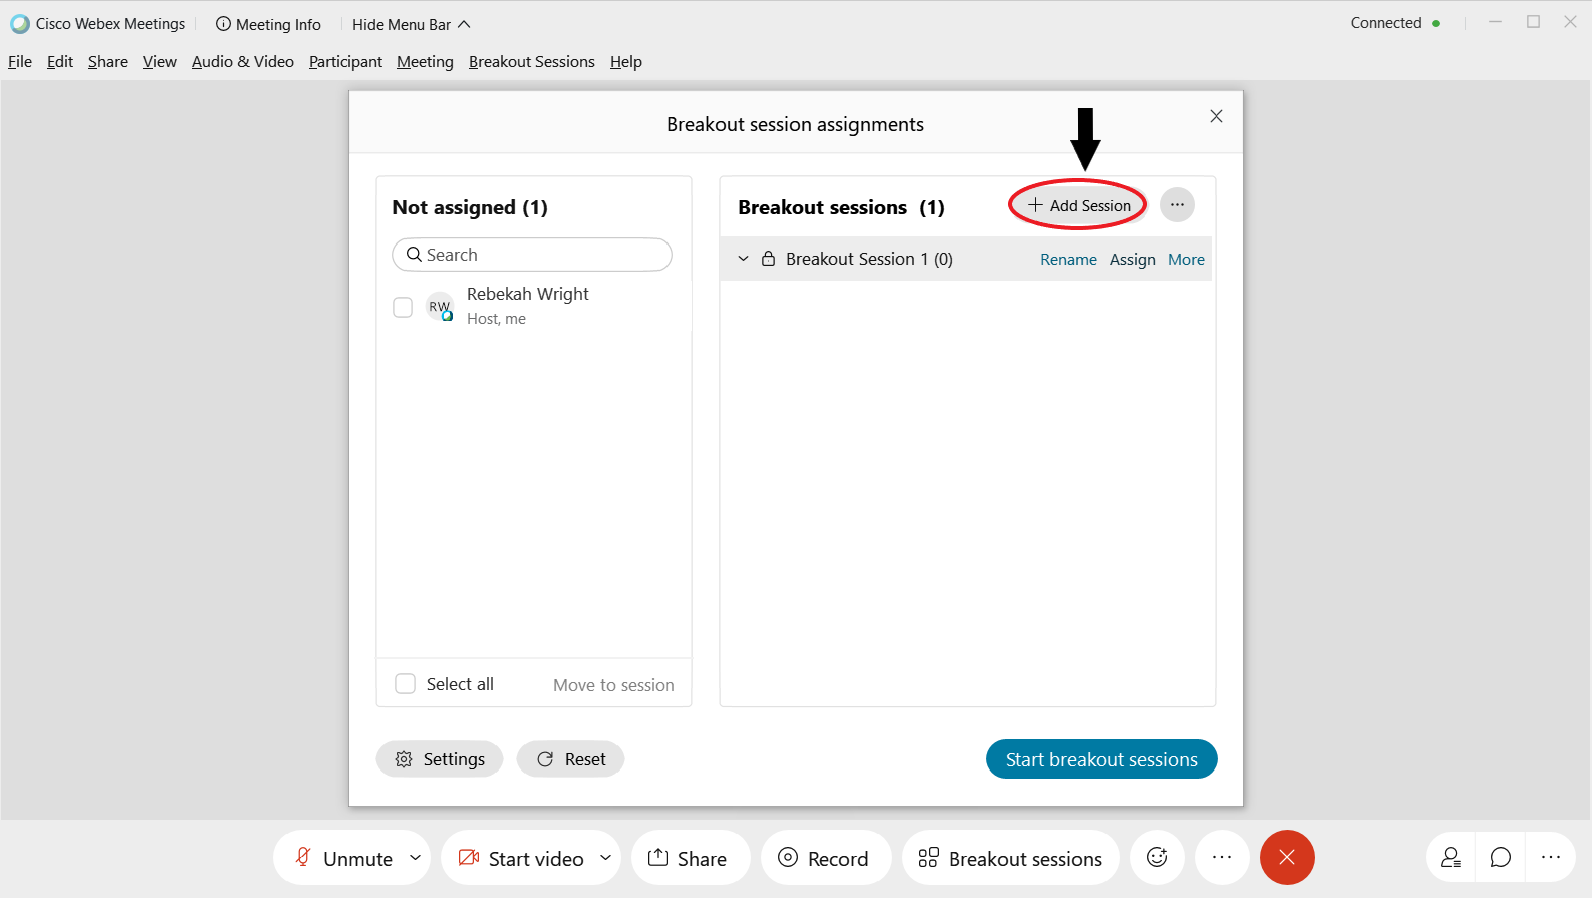
2. To add another breakout session, click Add Session. You can give the session a name or use the default name by hitting Enter.
3. To rename the breakout session, click Rename, and give the session a new name.